


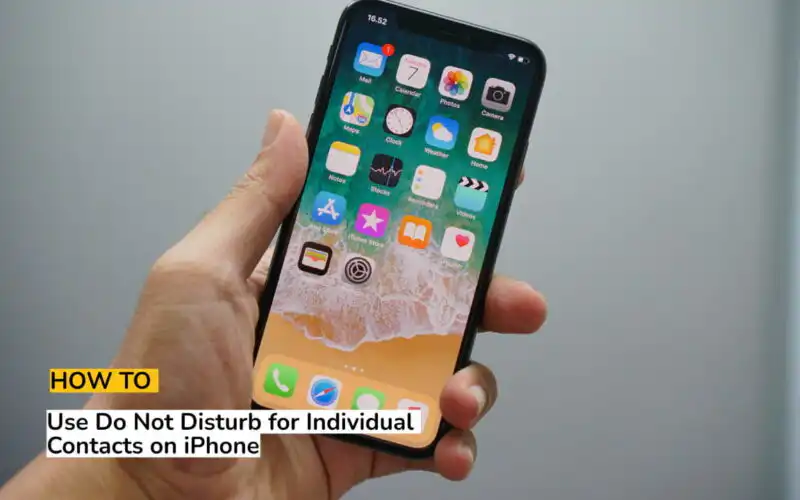
Do Not Disturb is a helpful feature on the iPhone that lets you silence incoming calls, alerts, and notifications while you’re busy or need some quiet time. However, sometimes you may want to silence only a specific person in your contacts without affecting others. In this guide, we’ll show you how to use Do Not Disturb for individual contacts on your iPhone running iOS 16.
Benefits of Using Do Not Disturb
Do Not Disturb is a great feature for managing your notifications and minimizing distractions, but it can be even more useful when you apply it to specific contacts. Here are some benefits of using Do Not Disturb for individual contacts on your iPhone:
- Focus on important tasks: By silencing notifications from distracting contacts, you can focus on your work, study, or other activities without interruptions.
- Prevent spam and harassment: If you’re receiving spam messages or unwanted calls from a specific contact, you can use Do Not Disturb to block them without blocking all unknown numbers.
- Control your notifications: With Do Not Disturb for individual contacts, you can customize your notification preferences for each contact based on your relationship, importance, or time zone.
Related: How to Change Airdrop Name on iPhone and iPad
Enabling Do Not Disturb for an Individual Contact on iPhone
Enabling DnD for Calls on iPhone
If you’re someone who frequently receives annoying calls, messages, or notifications from a particular person, you might want to know how to mute them on your iPhone. Fortunately, muting a contact is a straightforward process, and it can be done with just a few simple steps. In this article, we’ll guide you on how to mute a contact on your iPhone to silence calls, messages, and notifications from that person.
- Swipe up from the bottom of your iPhone screen to return to the home screen.
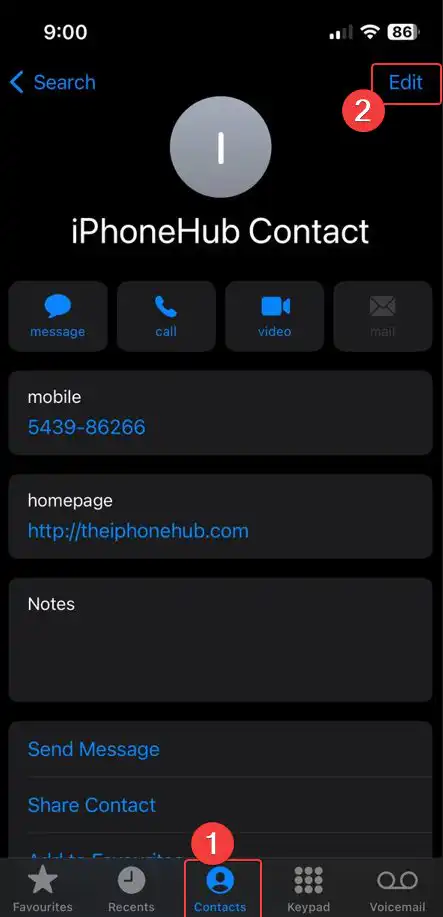
- Open the Phone app.
- Tap on “Contacts”.
- Select the contact you want to mute.
- Tap on “Edit” at the top of the screen.
- Tap on “Ringtone” and select a silent ringtone, either by purchasing one from the Tone Store or creating your own.
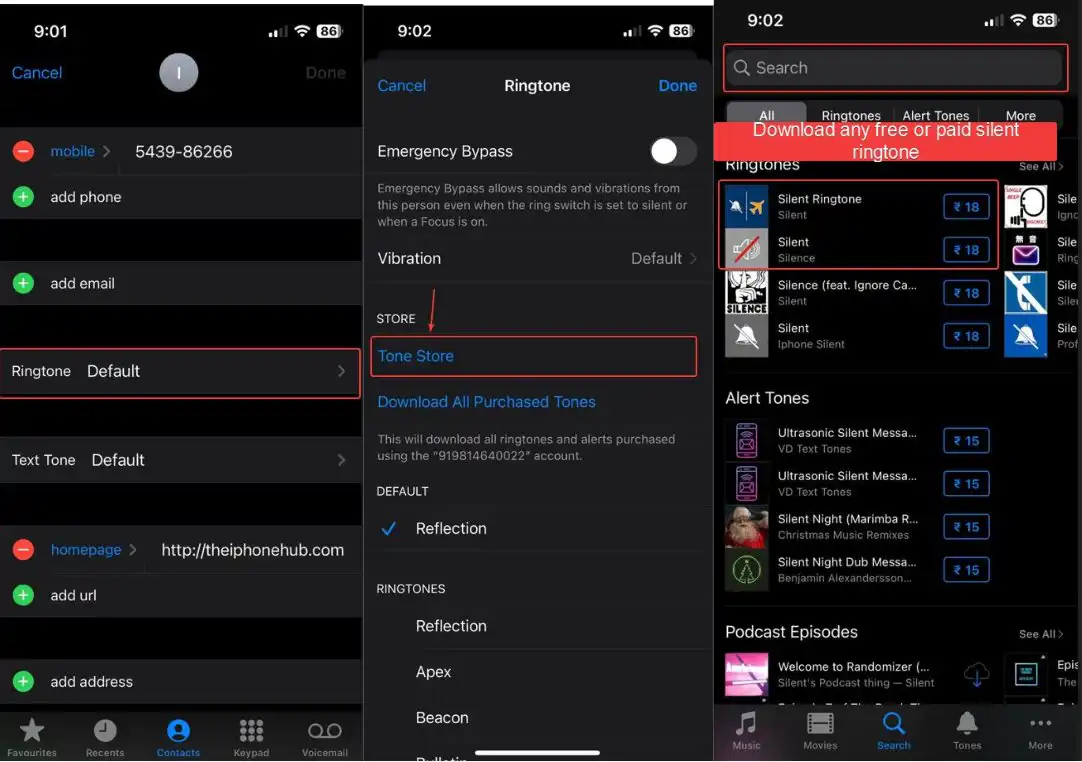
- Tap on “Vibration” again and select “None”.
- Tap on “Done” to save the changes.
That’s it! By following these steps, you can mute a contact on your iPhone and silence calls, messages, and notifications from that person.
Must See: How to Disable Split-Screen on iPad: A Step-by-Step Guide
Enabling DnD for iMessage
Here are the steps to turn on Do Not Disturb for an individual contact on your iPhone:
- Open the Messages app and select the conversation for the contact you want to put on Do Not Disturb.
- Tap their name.
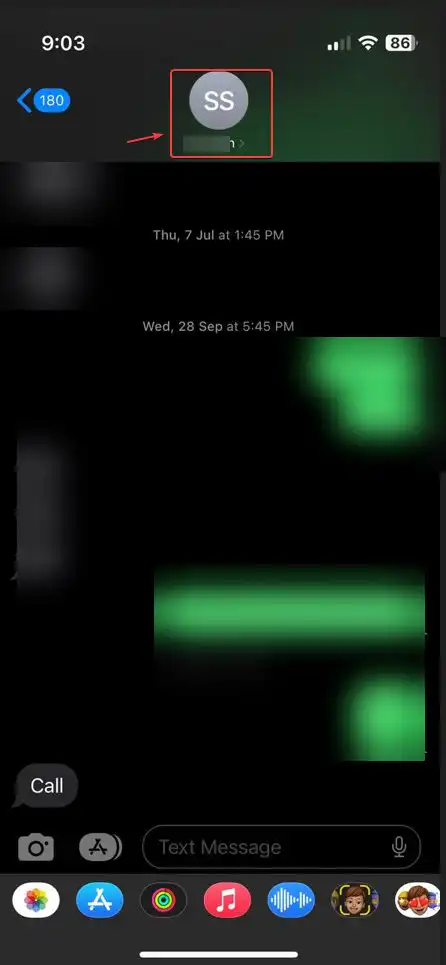
- Toggle on “Hide Alerts” and tap “Done”.
- You’ll notice a crescent moon symbol next to the contact’s icon and messages, indicating that they are on Do Not Disturb mode.
Tip: You can hide Alerts by simply swiping left on the conversation you want to enable Do Not Disturb.
With Do Not Disturb mode enabled for the contact, you won’t receive any notifications or calls from them, but you’ll still get alerts from other contacts as usual.
Disabling Do Not Disturb for iMessages
If you want to turn off Do Not Disturb mode for the contact and start receiving notifications from them again, follow these steps:
- Swipe left on the conversation in Messages. (or Toggle again to Enable)
- Tap the purple alarm bell icon to enable alerts again.
That’s it! You’ll now receive notifications and calls from the contact as usual.
Conclusion
Using Do Not Disturb for individual contacts on your iPhone is a simple and effective way to manage your notifications and stay focused. Whether you’re in a meeting, sleeping, or just need some quiet time, you can use this feature to silence the contacts that matter to you. Try it out and see how it can improve your iPhone experience!
FAQs to Use Do Not Disturb for Individual Contacts on iPhone
-
Can I enable Do Not Disturb for multiple contacts at once?
No, you need to enable Do Not Disturb for each contact individually.
-
Will the contact know that I’ve put them on Do Not Disturb?
No, the contact won’t receive any notification or indication that they are on Do Not Disturb mode.
-
Can I still receive calls from the contact when they are on Do Not Disturb?
No, calls from the contact will also be silenced when Do Not Disturb mode is enabled for them.
-
Will the contact be able to see that I’ve turned on Do Not Disturb for them?
No, the crescent moon symbol indicating Do Not Disturb mode will only be visible on your device, not the contact’s device.
-
Can I customize the notification preferences for each contact on Do Not Disturb mode?
No, the notification preferences for Do Not Disturb mode are the same for all contacts. However, you can still customize the ringtone or vibration pattern for each contact separately.
-
Can I put a specific person on Do Not Disturb?
Yes, you can put a specific person on Do Not Disturb by following the steps mentioned in the article. Simply open the Messages app and select the conversation of the contact you want to put on Do Not Disturb. Tap on the arrow next to the contact’s name, select “info,” and toggle on “Hide Alerts.” This will silence all notifications from that particular contact, including calls and messages.
By using this feature, you can still receive notifications from other contacts and avoid being disturbed by unwanted notifications from specific contacts. It’s a useful feature for those times when you need to focus on something important or when you simply need some quiet time. -
Can I silence all but one contact?
Yes, you can silence all contacts except one by enabling the “Emergency Bypass” feature for that particular contact. This feature allows calls and messages from a specific contact to come through even when Do Not Disturb mode is enabled for all contacts.
To enable “Emergency Bypass” for a contact, go to their contact information and select “Ringtone.” Toggle on “Emergency Bypass” to allow calls and messages from that contact to bypass Do Not Disturb mode.
This is a great option for those who have important contacts who they need to be available for at all times, such as family members or colleagues.