


As you might know Apple has introduced HEIC which stands for High Efficiency Image Format in iOS 11 which was launched back in 2017. It was designed to offer better compression without compromising on the quality of the image. The HEIC has smaller file size compared to the images with JPG format. The HEIC format is very efficient option for Apple users to store photos with saving storage space on your device.
The HEIC supports 16-bit color capture instead of 8-bit, You will get better pictures and use less space. But there is one drawback of HEIC format i.e. it works flawlessly only on Apple ecosystem. If you have a Mac device, then there is no issue while using the HEIC image. But HEIC format is not ideal for sharing with someone else. So here are some easy methods through which you can easily convert HEIC to JPG format on Mac devices.
Convert HEIC Photo to JPG on Mac using Preview
- Open the Photo that you want to convert in the Preview App.
- From the top menu select the File option, and after that select the Export option.
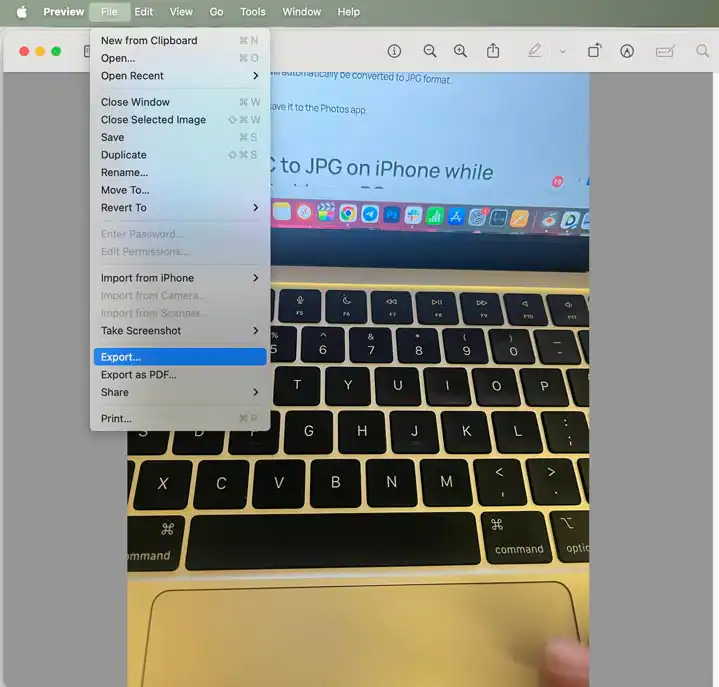
- Now you will see a prompt in which you will see a format option. In that, select JPG format.
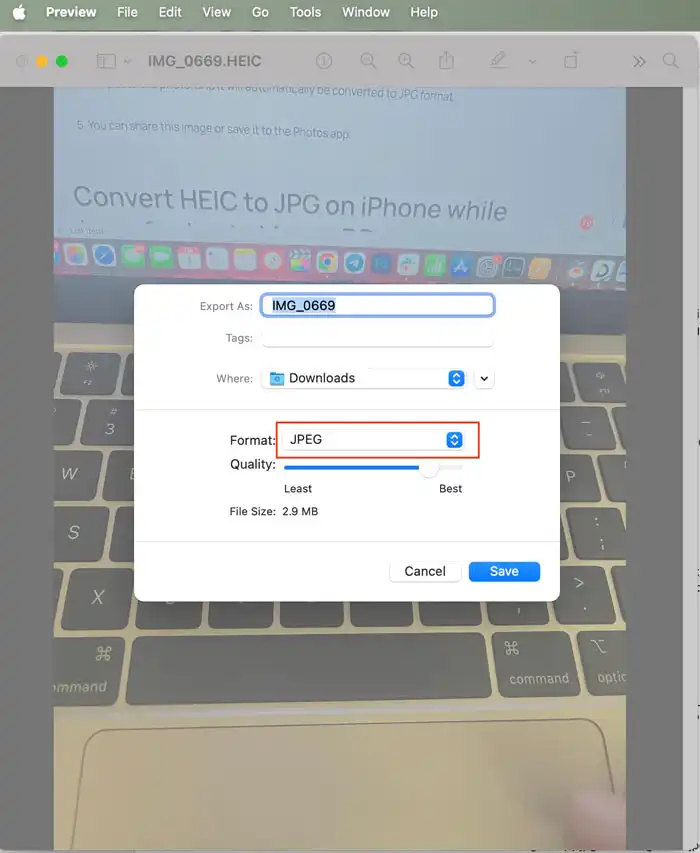
- Just click on the save button, and your photo will be converted from HEIC to JPG.
Related | How to Convert HEIC to JPG on iPhone
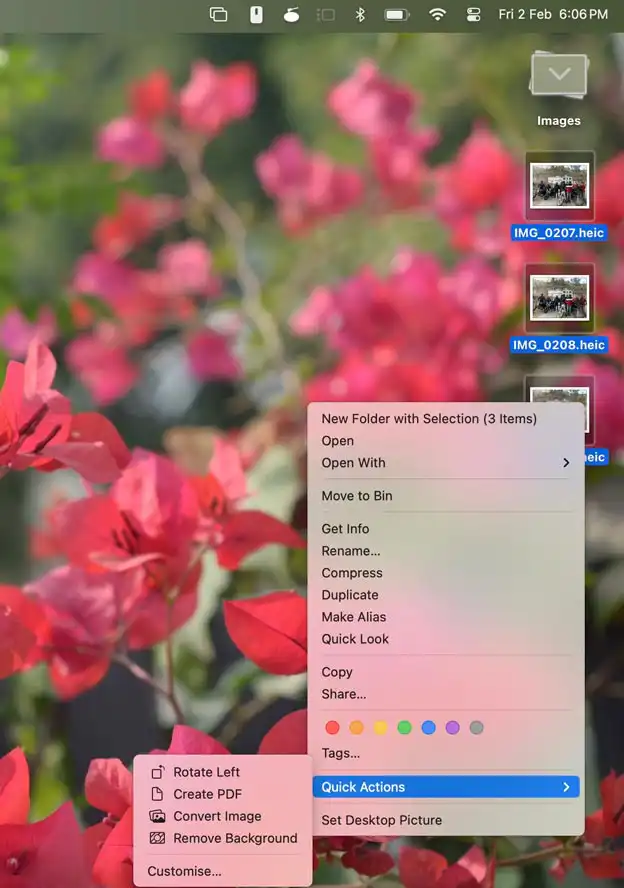
Convert HEIC to JPG on Mac using Quick Action
- Select the image that you want to convert in the Finder or desktop. Moreover, you can select more than one image at a time.
- Right-click on the selected photo, after that click on Quick Actions and then click on the Convert image option.
- Choose JPG/JPEG as the output format. You can also change the image size from the drop-down image size option.
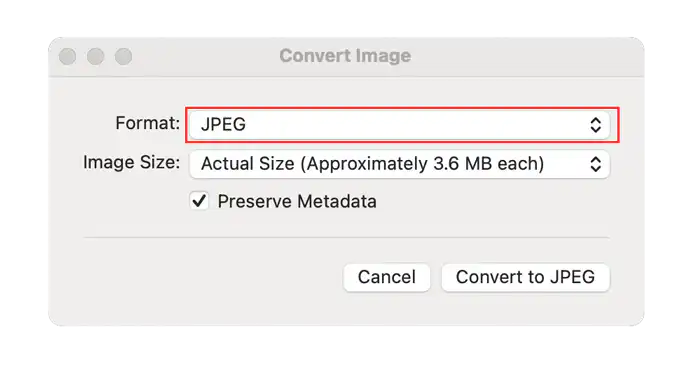
- Now just tap on “Convert to JPEG” button.
Read More about Mac