


Apple iPhone is the most popular smartphone in the market. As our daily life needs depend on the data stored on smartphones, so we should have a good backup system in place. In this article, we will guide you to back up an iPhone on Mac(Macbook Air, Macbook Pro, and iMac).
You can back up your iPhone on Mac using the Finder. You don’t need to use iTunes to back up iPhones now, Apple gives the backup feature in Finder in macOS Catalina. So Macs which are on macOS Catalina or later can directly back up their iPhones in Finder. You should follow the steps below to backup your iPhone.
Steps to Backup iPhone on your Macbook
![How to Back Up iPhone on Mac [Step by Step Guide] - The iPhoneHub](https://theiphonehub.com/wp-content/cache/flying-press/743dbd3689dc4ca82667788ca9eb69e0.jpg)
Step 1: Connect Your iPhone to Your Mac
To begin the backup process, connect your iPhone to your Mac using a Lightning cable. Ensure that your Mac is powered on and unlocked. If prompted, enter your iPhone passcode to establish a secure connection.

Step 2: Open Finder on Your Mac
Once your iPhone is connected, open the Finder application on your Mac. You can find the Finder icon either in your Dock or by using the Spotlight search.

Step 4: Select Your iPhone from the Sidebar
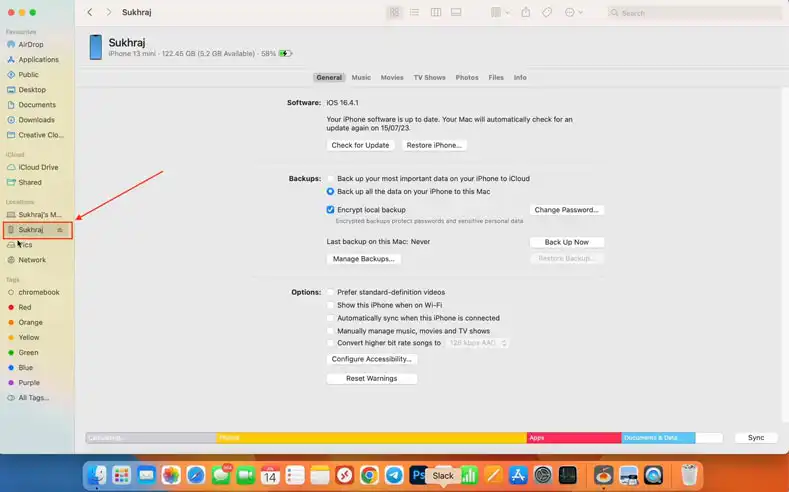
In the Finder window, locate the sidebar on the left-hand side of the screen. Under the Locations section, You’ll find your connected iPhones and other devices listed. Click on your iPhone to backup it on your Mac.
Step 3: Click on the Trust button
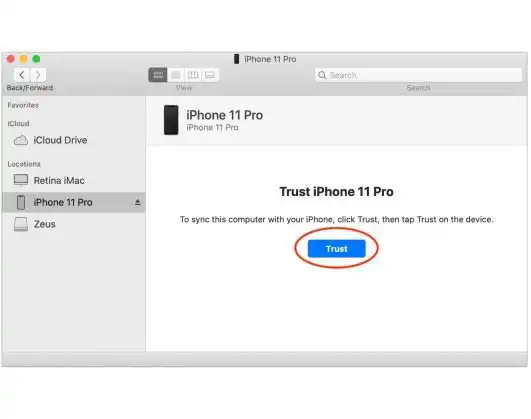
If you are connecting your iPhone with your Mac for the first time, then in Finder when you click on the iPhone from the left sidebar you will see a question that asks you this iPhone on your Mac device. Just click on Trush Button.
Step 5: Choose the Backup Method
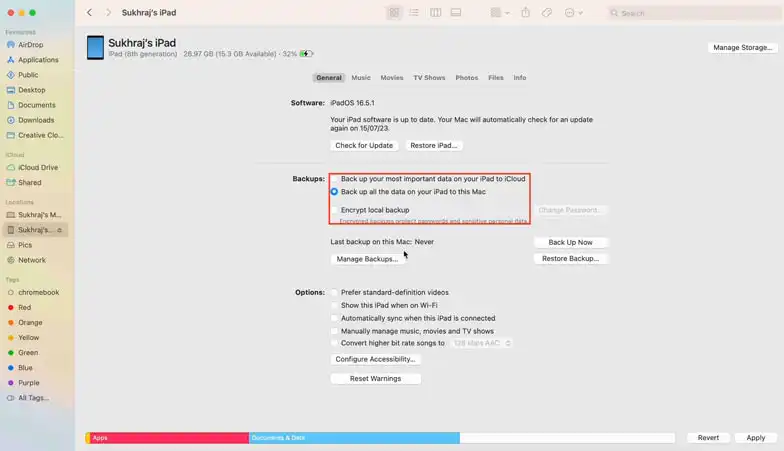
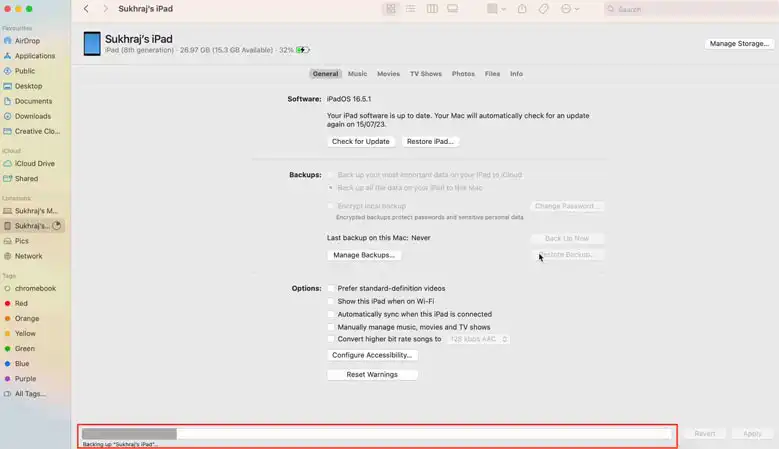
Within the main Finder window, you’ll see an overview of your iPhone. Look for the “Back Up Now” button and click on it to initiate the backup process. You’ll have the option to choose between “Backup All of the Data on your iPhone” or “Backup Selected Data Only.” Select the option that best suits your preferences.
Step 6: Wait for the Backup to Complete
After initiating the backup, allow some time for it to complete, depending on the amount of data on your iPhone. It’s important to keep your iPhone connected to your Mac during this process and avoid disconnecting it prematurely. You can monitor the progress of the backup in the Finder window.
Step 7: Verify the Backup
Once the backup process is complete, it’s essential to verify its success. Navigate to the “General” tab within the iPhone overview in Finder. Under the “Backups” section, you should see the date and time of the most recent backup. This verification will provide reassurance that your iPhone data is securely backed up on your Mac.

RELATED | HOW TO TRANSFER PHOTOS FROM IPHONE TO PC
How to Backup Your iPhone on Mac: Common FAQs
- Q: Can I back up my iPhone wirelessly on a Mac? A: Yes, you can back up your iPhone wirelessly on a Mac using iCloud. Simply enable iCloud Backup in your iPhone’s settings and ensure that your Mac is connected to the same iCloud account. The backup will automatically occur when your iPhone is connected to Wi-Fi and charging.
- Q: What happens if I disconnect my iPhone during the backup process? A: It’s strongly advised not to disconnect your iPhone during the backup process. Doing so may result in an incomplete backup or potential data loss. Keep your iPhone connected to your Mac until the backup is complete.
- Q: Can I access and restore specific files from the backup? A: Yes, you can access and restore specific files from the backup using the Finder application on your Mac. Connect your iPhone, open Finder, select your device, and navigate to the backup. From there, you can choose the files or data you want to restore.